9 - Enemies and Basic AI
What would a dungeon game be without enemies? Let's add some!
-
This should be second nature by now - add two new entity types in your Ogmo project,
enemyandboss: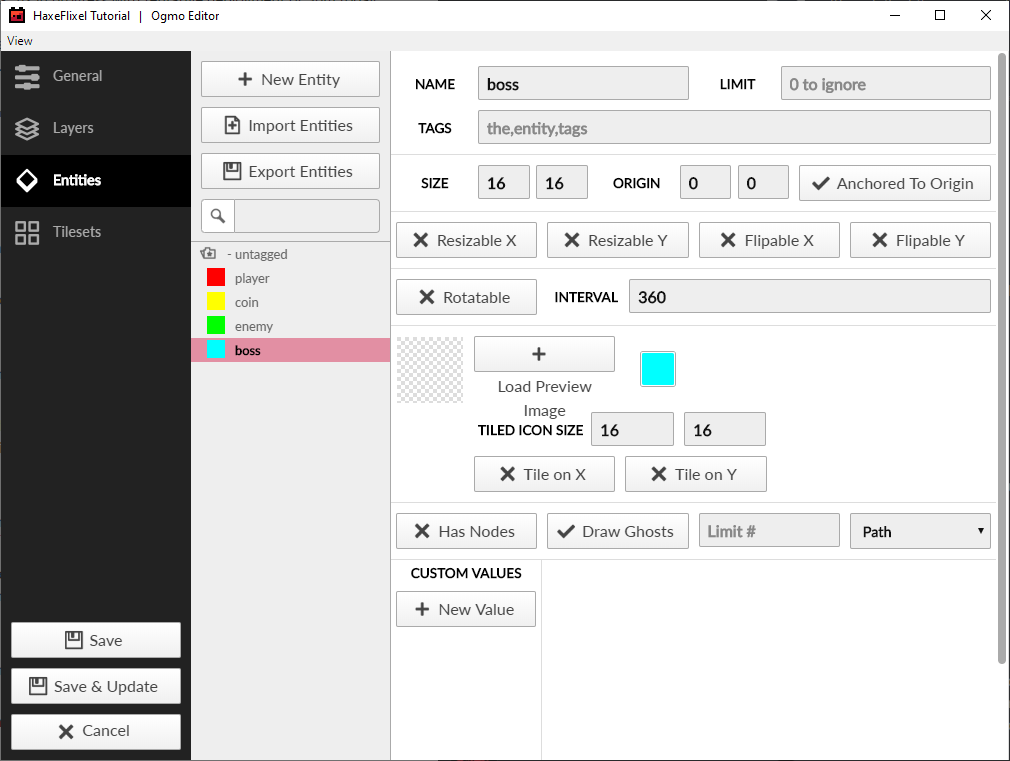
-
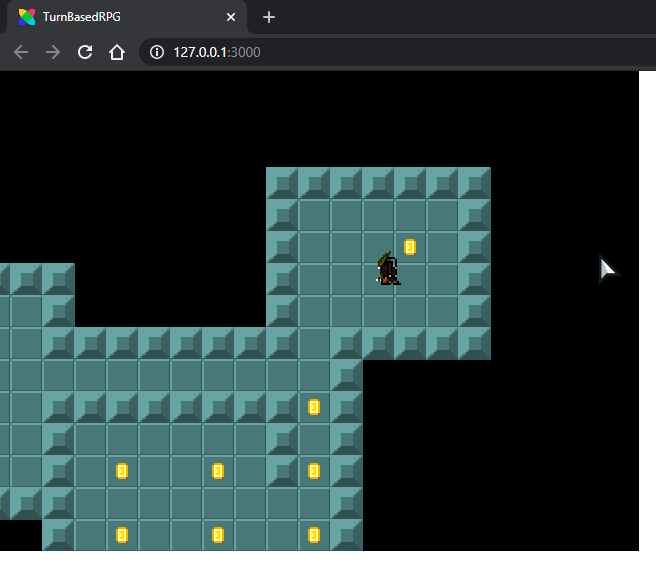
Then scatter some enemies and a boss around the map.

-
So we want to have 2 different enemies in our game. We'll need spritesheets for both of them, with 16x16 pixel frames and the same animation frames as our player. Name them
enemy.pngandboss.pngand put them in theassets/imagesfolder. You can use these, if you want (thanks, again, Vicky!):

Note: make sure that your enemy sprites are functionally the same - they should have the same number of frames for each
facinganimation. -
Let's add a new some code for enemies. Since we're going to have two different types of enemies, regular enemies and the boss, let's start by creating an
EnemyTypeenumeration:enum EnemyType { REGULAR; BOSS; }HAXEThis basically just gives us two handy constants that we can use to distuingish them. We will put both the
enumand ourEnemyclass into the sameEnemy.hx"module" (that's what.hxfiles are called). The class is going to look very similar to ourPlayer:package; import flixel.FlxSprite; enum EnemyType { REGULAR; BOSS; } class Enemy extends FlxSprite { static inline var WALK_SPEED:Float = 40; static inline var CHASE_SPEED:Float = 70; var type:EnemyType; public function new(x:Float, y:Float, type:EnemyType) { super(x, y); this.type = type; var graphic = if (type == BOSS) AssetPaths.boss__png else AssetPaths.enemy__png; loadGraphic(graphic, true, 16, 16); setFacingFlip(LEFT, false, false); setFacingFlip(RIGHT, true, false); animation.add("d_idle", [0]); animation.add("lr_idle", [3]); animation.add("u_idle", [6]); animation.add("d_walk", [0, 1, 0, 2], 6); animation.add("lr_walk", [3, 4, 3, 5], 6); animation.add("u_walk", [6, 7, 6, 8], 6); drag.x = drag.y = 10; setSize(8, 8); offset.x = 4; offset.y = 8; } override public function update(elapsed:Float) { var action = "idle"; if (velocity.x != 0 || velocity.y != 0) { action = "walk"; if (Math.abs(velocity.x) > Math.abs(velocity.y)) { if (velocity.x < 0) facing = LEFT; else facing = RIGHT; } else { if (velocity.y < 0) facing = UP; else facing = DOWN; } } switch (facing) { case LEFT, RIGHT: animation.play("lr_" + action); case UP: animation.play("u_" + action); case DOWN: animation.play("d_" + action); case _: } super.update(elapsed); } }HAXEThe main difference is that we have a new
typevariable, which we will use to figure out which enemy sprite to load, and which one we're dealing with, etc. -
Next, we'll make a
FlxGroupin ourPlayStateto hold our enemies, and load them into the map, very much the same way we did our coins.At the top of our class, add:
var enemies:FlxTypedGroup<Enemy>;HAXEIn the create function, right after we add our coin group:
enemies = new FlxTypedGroup<Enemy>(); add(enemies);HAXEWe will also need to add two more cases to our
placeEntities()function:else if (entity.name == "enemy") { enemies.add(new Enemy(entity.x + 4, entity.y, REGULAR)); } else if (entity.name == "boss") { enemies.add(new Enemy(entity.x + 4, entity.y, BOSS)); }HAXEGo ahead and test out your game to make sure the enemies are added properly.
-
(optional step) Our
placeEntities()is starting to get a bit repetitive. Eachifchecksentity.name, and each time we useentity.xandentity.y.Let's fix this by using a
switch-caseinstead of anif/else-chain, as well as adding some temporaryxandyvariables:var x = entity.x; var y = entity.y; switch (entity.name) { case "player": player.setPosition(x, y); case "coin": coins.add(new Coin(x + 4, y + 4)); case "enemy": enemies.add(new Enemy(x + 4, y, REGULAR)); case "boss": enemies.add(new Enemy(x + 4, y, BOSS)); }HAXEThere, that's a lot easier to read!
Now let's give our enemies some brains.
In order to let our enemies 'think', we're going to utilize a very simple Finite-state Machine (FSM). Basically, the FSM works by saying that a given machine (or entity) can only be in one state at a time. For our enemies, we're going to give them 2 possible states: Idle and Chase. When they can't 'see' the player, they will be Idle - wandering around aimlessly. Once the player is in view, however, they will switch to the Chase state and run towards the player.
-
Shouldn't be that hard! First, we'll make our
FSMclass:class FSM { public var activeState:Float->Void; public function new(initialState:Float->Void) { activeState = initialState; } public function update(elapsed:Float) { activeState(elapsed); } }HAXE -
Next, we'll change our
Enemyclass a little.We need to define these variables at the top of the class:
var brain:FSM; var idleTimer:Float; var moveDirection:Float; var seesPlayer:Bool; var playerPosition:FlxPoint;HAXE -
At the end of the constructor, add:
brain = new FSM(idle); idleTimer = 0; playerPosition = FlxPoint.get();HAXE -
And then add the following functions:
function idle(elapsed:Float) { if (seesPlayer) { brain.activeState = chase; } else if (idleTimer <= 0) { // 95% chance to move if (FlxG.random.bool(95)) { moveDirection = FlxG.random.int(0, 8) * 45; velocity.setPolarDegrees(WALK_SPEED, moveDirection); } else { moveDirection = -1; velocity.x = velocity.y = 0; } idleTimer = FlxG.random.int(1, 4); } else idleTimer -= elapsed; } function chase(elapsed:Float) { if (!seesPlayer) { brain.activeState = idle; } else { FlxVelocity.moveTowardsPoint(this, playerPosition, CHASE_SPEED); } }HAXEAlso add this line to
update()beforesuper.update(elapsed):brain.update(elapsed);HAXEThe way this is going to work is that each enemy will start in the
Idlestate. In thePlayStatewe will have each enemy check to see if it can see the player or not. If it can, it will switch to theChasestate, until it can't see the player anymore. While in theIdlestate, every so often (in random intervals) it will choose a random direction to move in for a little while (with a small chance to just stand still). While in theChasestate, they will move directly towards the player. -
Let's jump over to the
PlayStateto add our player's vision logic. Inupdate(), under the overlap and collision checks, add:FlxG.collide(enemies, walls); enemies.forEachAlive(checkEnemyVision);HAXE -
Next, add the
checkEnemyVision()function:function checkEnemyVision(enemy:Enemy) { if (walls.ray(enemy.getMidpoint(), player.getMidpoint())) { enemy.seesPlayer = true; enemy.playerPosition = player.getMidpoint(); } else { enemy.seesPlayer = false; } }HAXENote how we need to modify two enemy variables for this. The default visibility in Haxe is
private, so the compiler doesn't allow this. We will have to make thempublicinstead:public var seesPlayer:Bool; public var playerPosition:FlxPoint;HAXE
That's all there is to it! Try out your game and make sure it works.
Next, we'll add some UI to the game, and add our RPG-style combat so you can fight the enemies!