5 - Creating a Tilemap
Now it's time to make some maps for the player to move around in! To do this, we're going to use a tool called Ogmo Editor. Ogmo is a free tilemap editor that works very nicely with HaxeFlixel. For this part of the tutorial, we're just going to use a simple 2-tile tilesheet with a tile for walls and a tile for floors.
You can make your own, with 16x16 pixel tiles, or use this one:

(Note: the first tile should be empty!)
-
Download and install Ogmo Editor 3, then launch it.
-
Click on
New Projectand navigate toassets/data- save the project asturnBasedRPG.ogmo. -
On the
Generaltab, you can rename your project, set the default level sizes, and more. Set it up like this: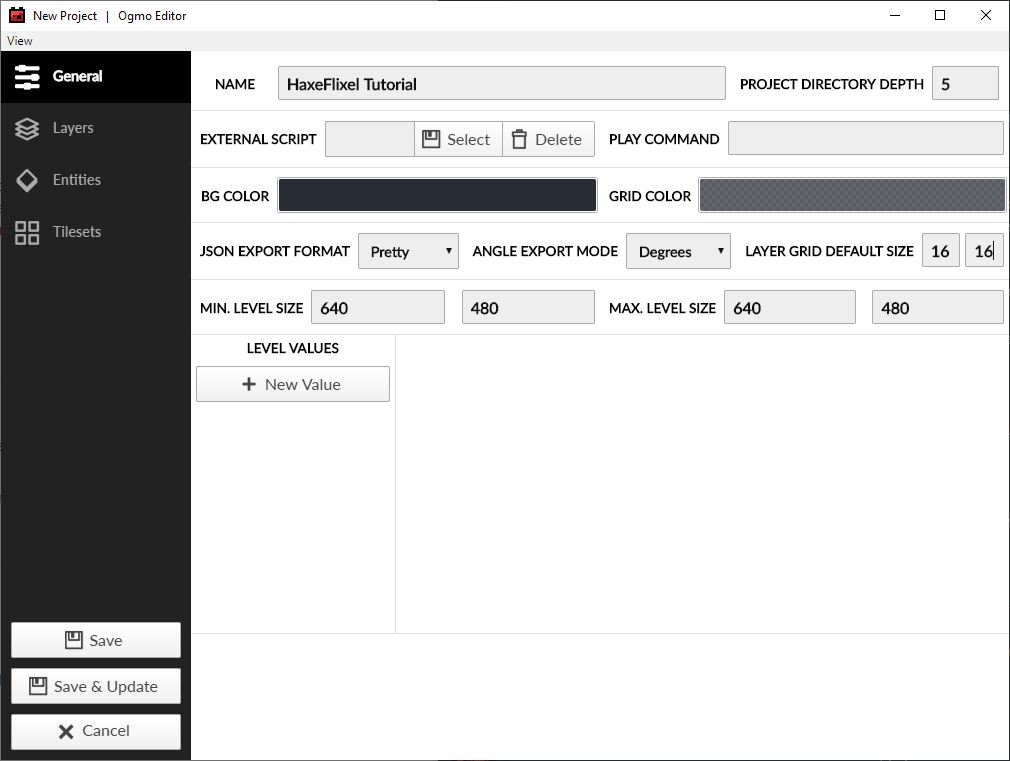
-
On the
Layerstab, make anEntity Layercalledentitiesand aTile Layercalledwalls: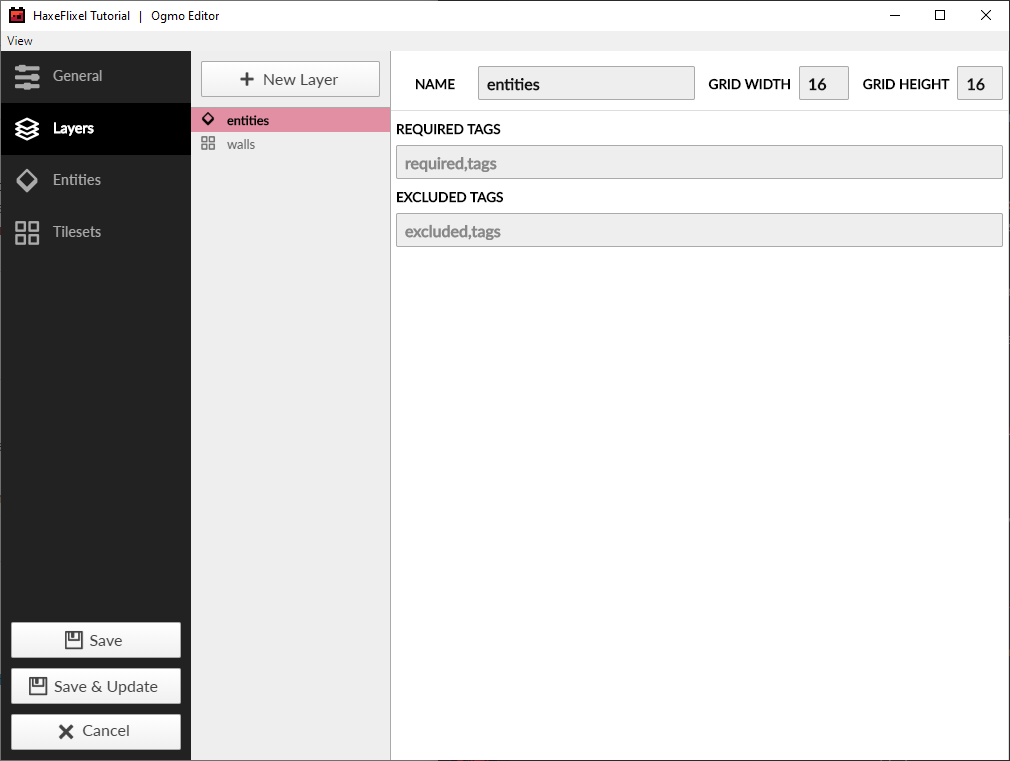
-
On the
Entitiestab, make an entity calledplayer: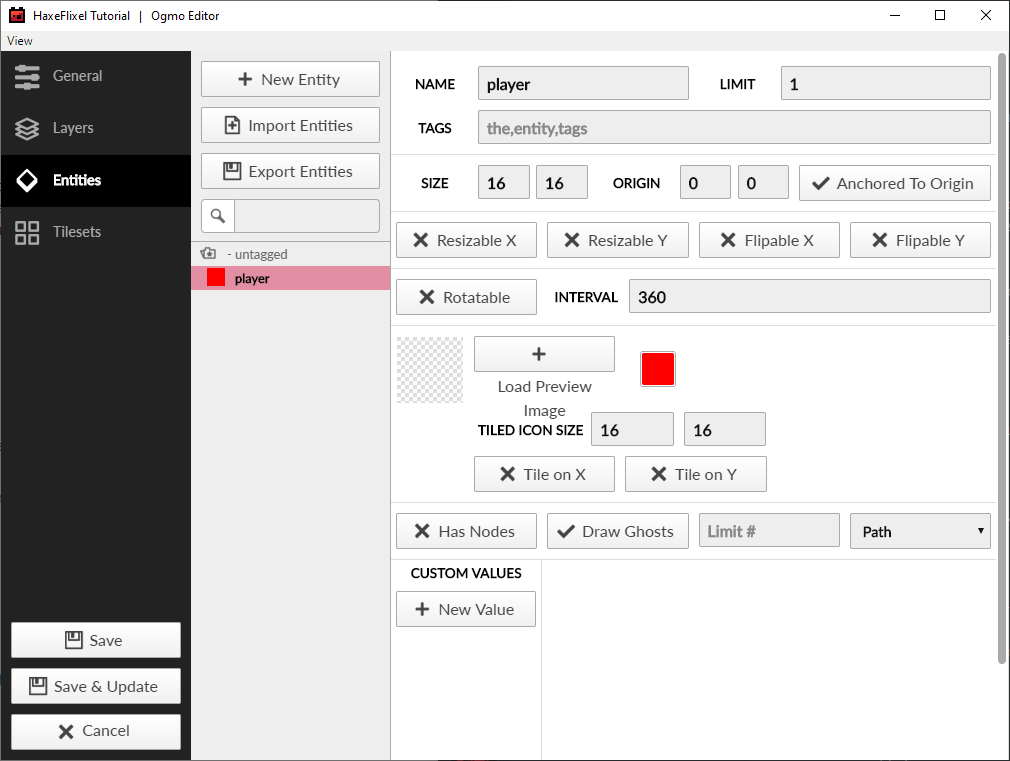
-
Finally, on the
Tilesetstab, make a new tileset calledtilesand load the tiles from earlier: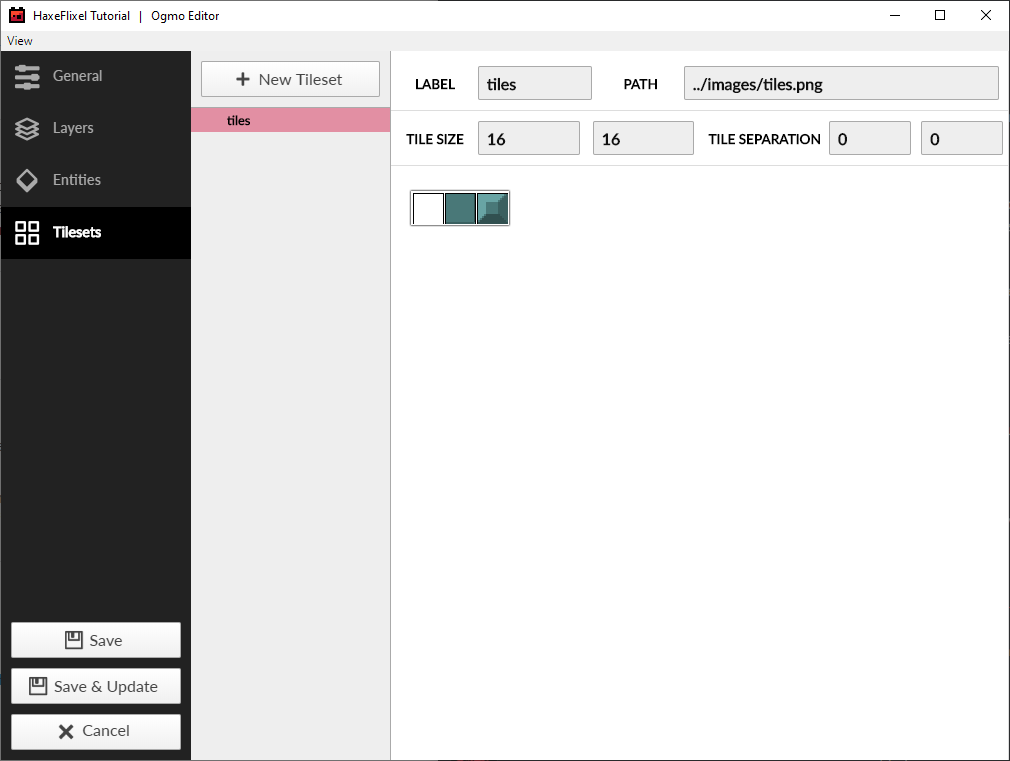
-
When you're done, click on
Saveand you'll be brought to this screen: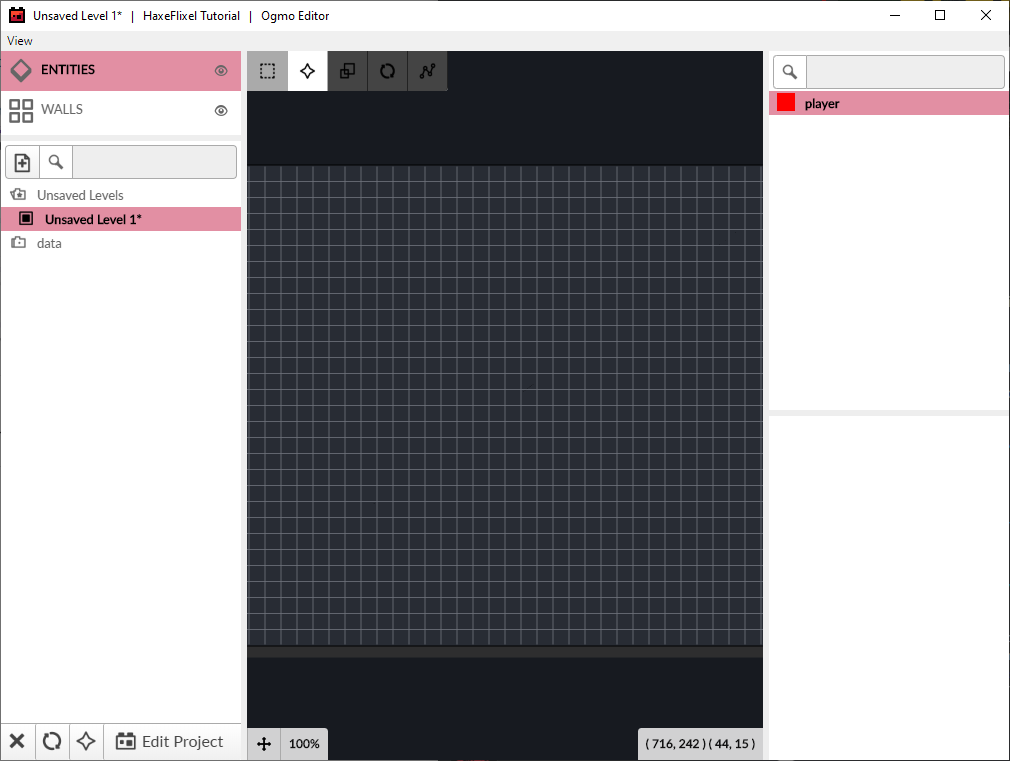
-
Make sure you're on the
wallslayer, and using the tools at the top, draw out a simple map. Make sure it's completely encircled by walls (so the player can't wander off the map), and make the insides filled with floor tiles. You should end up with something like this: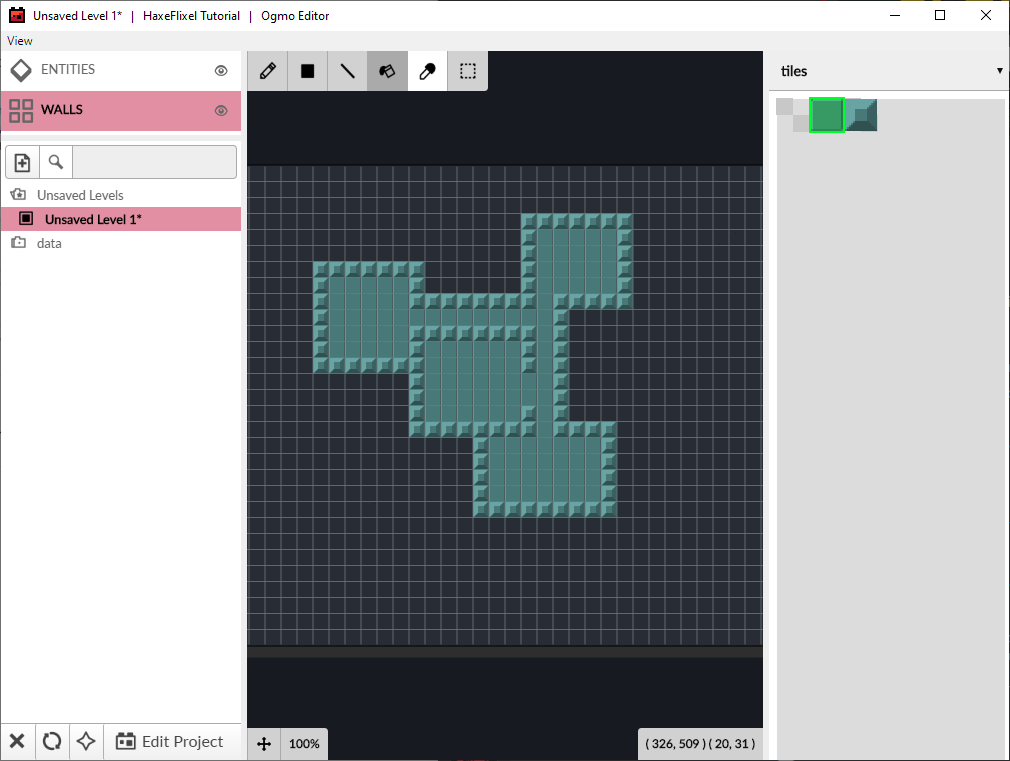
-
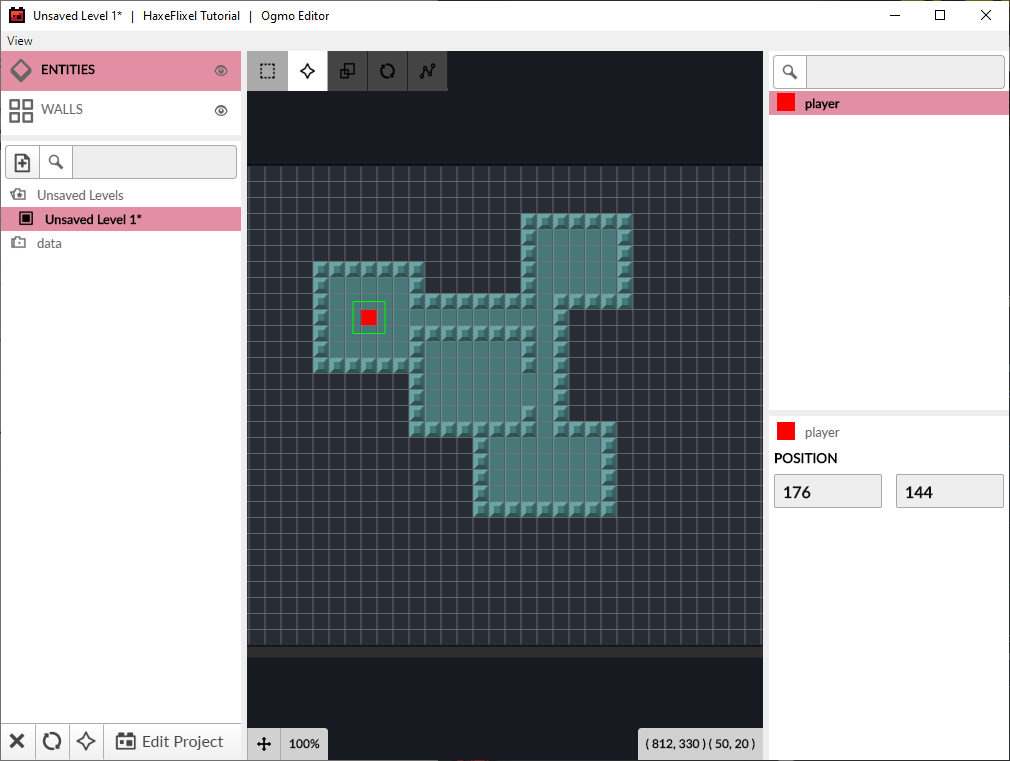
Now, switch over to the 'entities' layer, and place your player entity somewhere in one of your rooms:
-
Hit Ctrl+S (Cmd+S on Mac), and save this level as
room-001.jsoninassets/data.
We're done with Ogmo for now, so save all your changes and exit.
In the next part, we will learn how to load the newly created tilemap into our game.